On Collecting Kachina Dolls, Part 3 (of a seven part series)
Robert Cafazzo
Two Graces, Taos
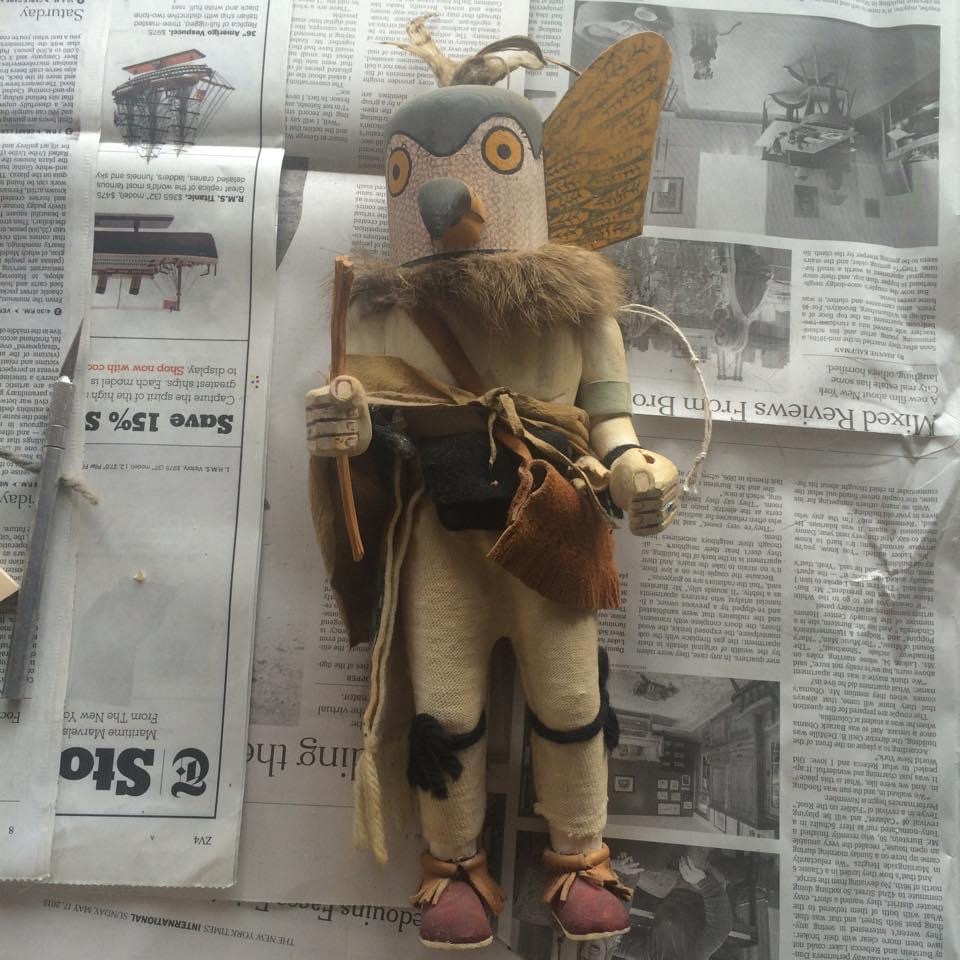
Restoration requiring new horns, forearms, missing toe, and feather work
Repairs & Restoration of Kachina Dolls:
Kachina Doll repairs should be done by a professional. I have been repairing Kachinas and wood carvings since 1980. I’ve gone so far as to travel to the Hopi mesas and ask permission to repair certain items and have been granted access to gathering materials for the repairs.
Lost missing pieces can be replaced. Often times a broken foot is a good indicator of age and of your doll being the real deal. Feet are one of the first parts of a doll to break off when played with, usually the toe tip winds up lost, this too can be replaced. Replacement of a nose, ears/horns, rattle or staff can all be accomplished.
Restoration requiring a new top knot and new feet
I’m not big on attaching dolls to bases of any sort, I prefer a kachina to be hung on a wall usually over a window or doorway. Whenever possible it is best to add a fresh new cotton string to hang your doll from. Try to resist the ‘southwest’ style of hanging the doll over a fireplace or placing them onto a fireplace mantel, the heat and smoke will eventually do irreparable damage.
I have repaired Kachinas and Santos for some of the Best Collectors and Museums. People have been finding me by word of mouth, I am careful and patient. In other words I take my time. Carefully removing excessive old glue repairs is just one of the time consuming things I do. Gathering the correct materials is also a time consuming aspect of the repair work.
Restoration requiring replacement of a missing tableta section, a new forearm, toe and cracked tableta repair
A side note, there are collectors and dealers who frown on (or poo-poo) the restoration of kachina dolls. When I first began restoration work dealers told me that any replacements and repairs should be noted to my clients. I’ve never known any of them to mention this to any of their own clients. Restoring damaged or broken items is an age old tradition, there aren’t enough restoration experts and very few training programs or apprenticeships. However not all restoration is done properly, adding a new nose that is the wrong shape and size can confuse collectors as to being able to identify the doll. Surprisingly this is more common than I would have thought possible. I have added an entire section below all about restoration techniques, I hope you’ll take a look at what's involved.
This set had been reversed at some time when they had been remounted to the board they stand on,
a correction to this and making certain they were now stable
My repairs average $100. per repaired item. I will get back to you quickly with an estimate if your doll is something I choose to restore for you. IF it is not, I may or may not get back to you. There are many restoration people who I would not trust. A recommendation of someone else, would be based on actually seeing that persons work. Self supposed ‘experts’ will cause more harm than good. Too many restorers will repaint much, if not all of the carving, to me this is the worst way to handle any restoration.
My turnaround on restoration is 8-10 WEEKS, meaning you will need to be patient. I have a tendency to fall behind with repairs, they seem to all turn up at once.
Shipping or delivering your doll to me, requires that you pay for return shipping or arrange pickup. I ONLY use USPS, (UPS has been careless with packages). I require payment up front for repairs.
Putting the broken tableta back together and gathering strands of wheat to replace the very brittle broken off pieces
Please Note:
If you NEED a doll repaired, the first thing to do is:
SEND ME A PHOTOGRAPH in an EMAIL to: r2c2graces@gmail.com or TEXT to: 575-770-5580
Otherwise, you have wasted my time and yours.
I am now ONLY repairing Older than 1970's Hopi Kachina Dolls.
I will not be repairing any sort of Contemporary or Navajo Dolls.
Absolutely None.
What I do is Time Consuming and needs to be done with my head into it in a respectful manner, I take this quite seriously.
I have a standardized price list which I use for reference on all repair estimates. My personal repair price guide is updated every 5 years.
Chances are strong that I will turn down most repairs.
I can no longer do everything that I once could do.
Thank You for understanding.
A project I'd turned down was this now hollow carving damaged by a type of termite
For repair service please contact us at:
Two Graces, PO Box 1587, Ranchos de Taos, NM 87557
We are located in the historic district of Taos at 105 Barela Lane
575-770-5580
r2c2graces@gmail.com
To see examples of restoration projects please refer to my Instagram account @KachinaRestoration
I am available for lecturing engagements on this subject to share my knowledge, hopefully sparking the interest of someone else who would carry on this work.
Starting with removing glue from old repairs, I then filled in cracks, made new dowels and parts
Restoration Supplies:
(As you can see the list is quite long)
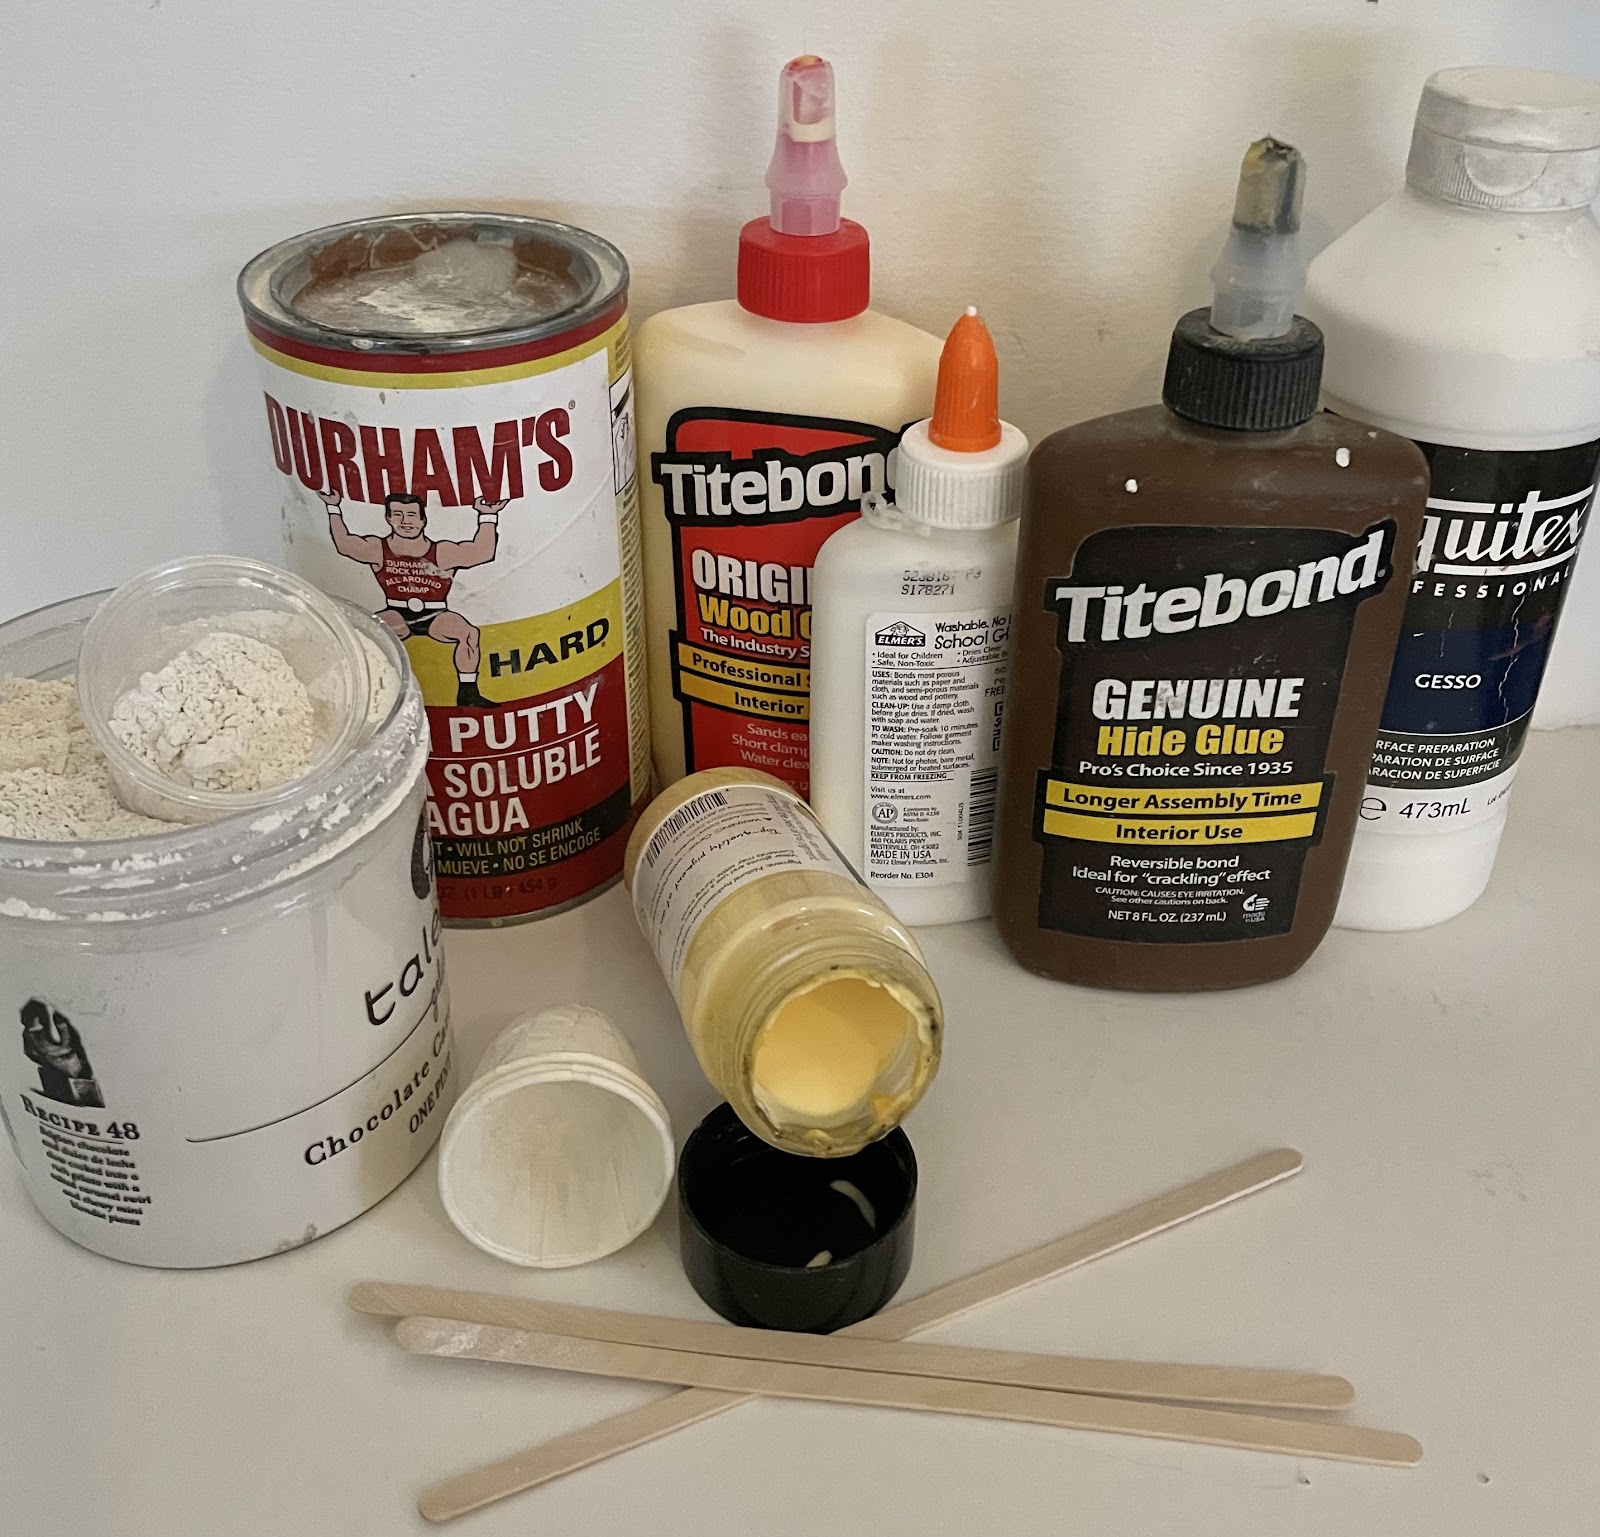
Wood Glue (thickened)
Rabbit Skin Glue, Hide Glue (premade)
White Elmers Glue
Coffee Stirring Sticks
Water Color Brushes, varying sizes
ExActo Knife (smaller size) and extra blades
Dremel Electric Tool with a very small drill bit along with small and medium sanding bits
Small Fine Crafters Saw, (similar to a hack saw)
Bamboo Skewers
Long Sharp Pushpin
Sand Paper (various grits)
Emory Boards/Nail Files
Cottonwood Root or Branches (cutup into various shapes and sizes), alternatively driftwood may be used as the sap has been leached from it, making it softer and more compatible to the original Cottonwood.
Small Mixing Cups
White Powdered Kaolin Clay
Durham’s Rock Hard Powdered Water Putty
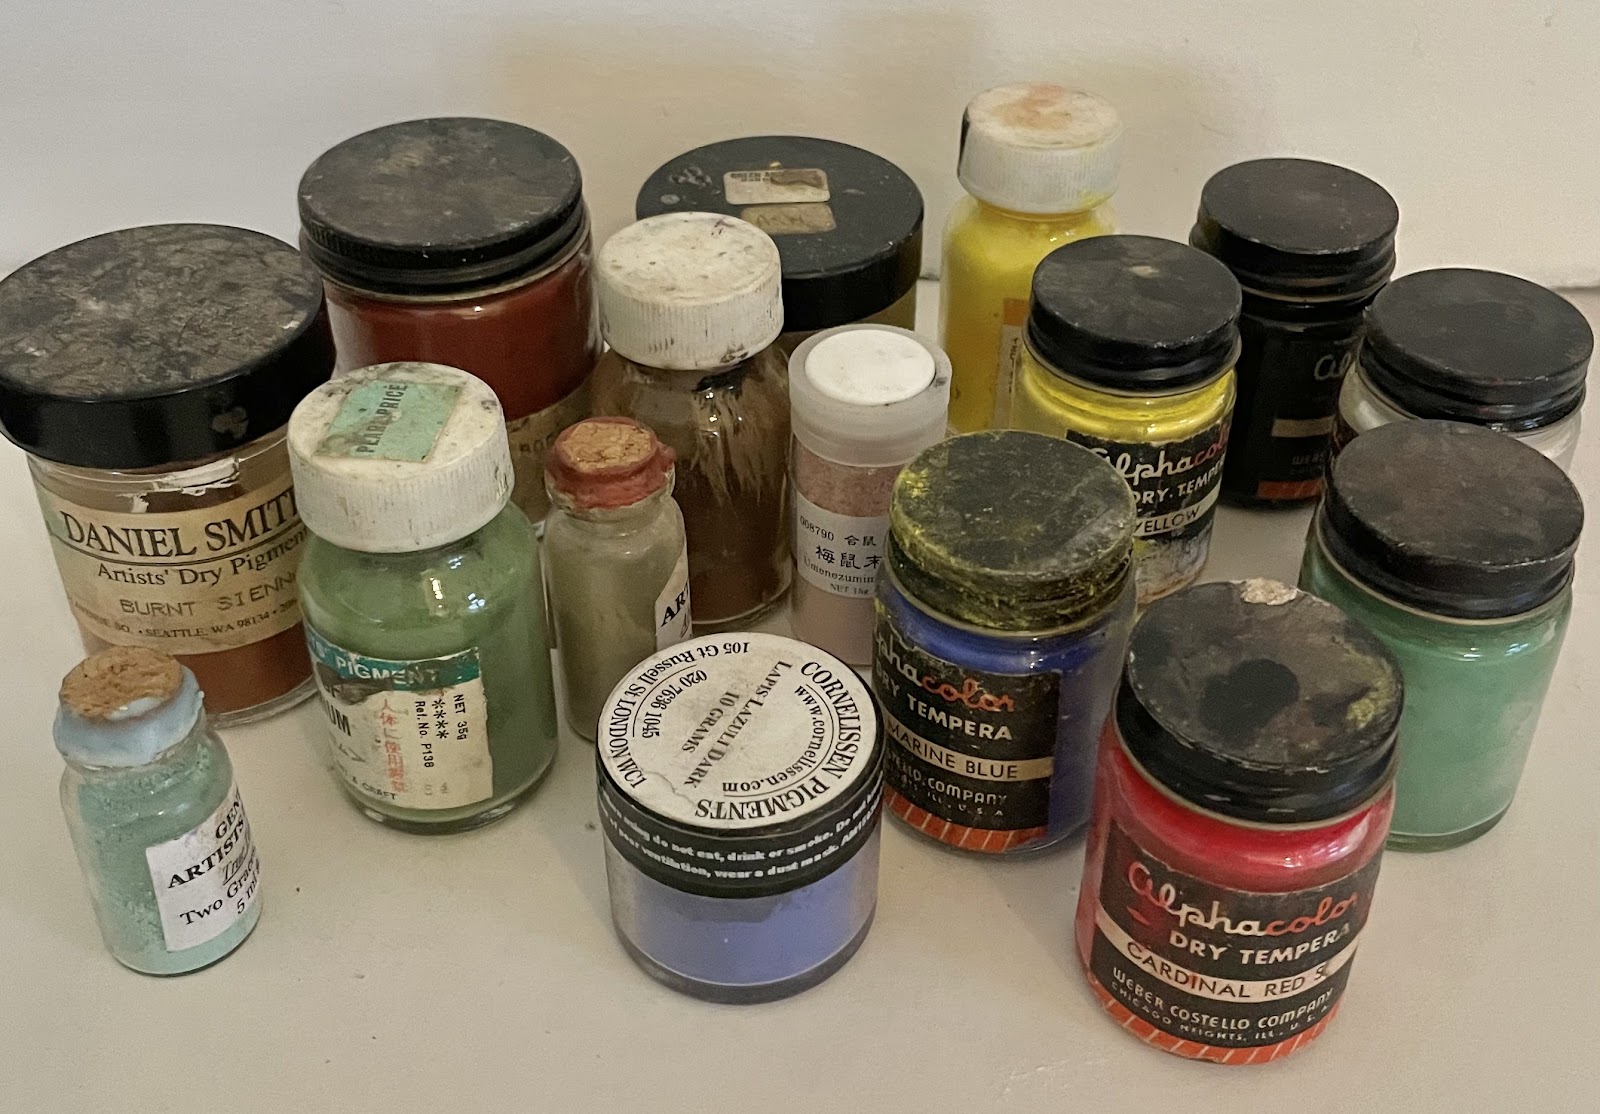
Natural Pigments
Vintage Powdered Tempera
Assorted Chalk Pastels
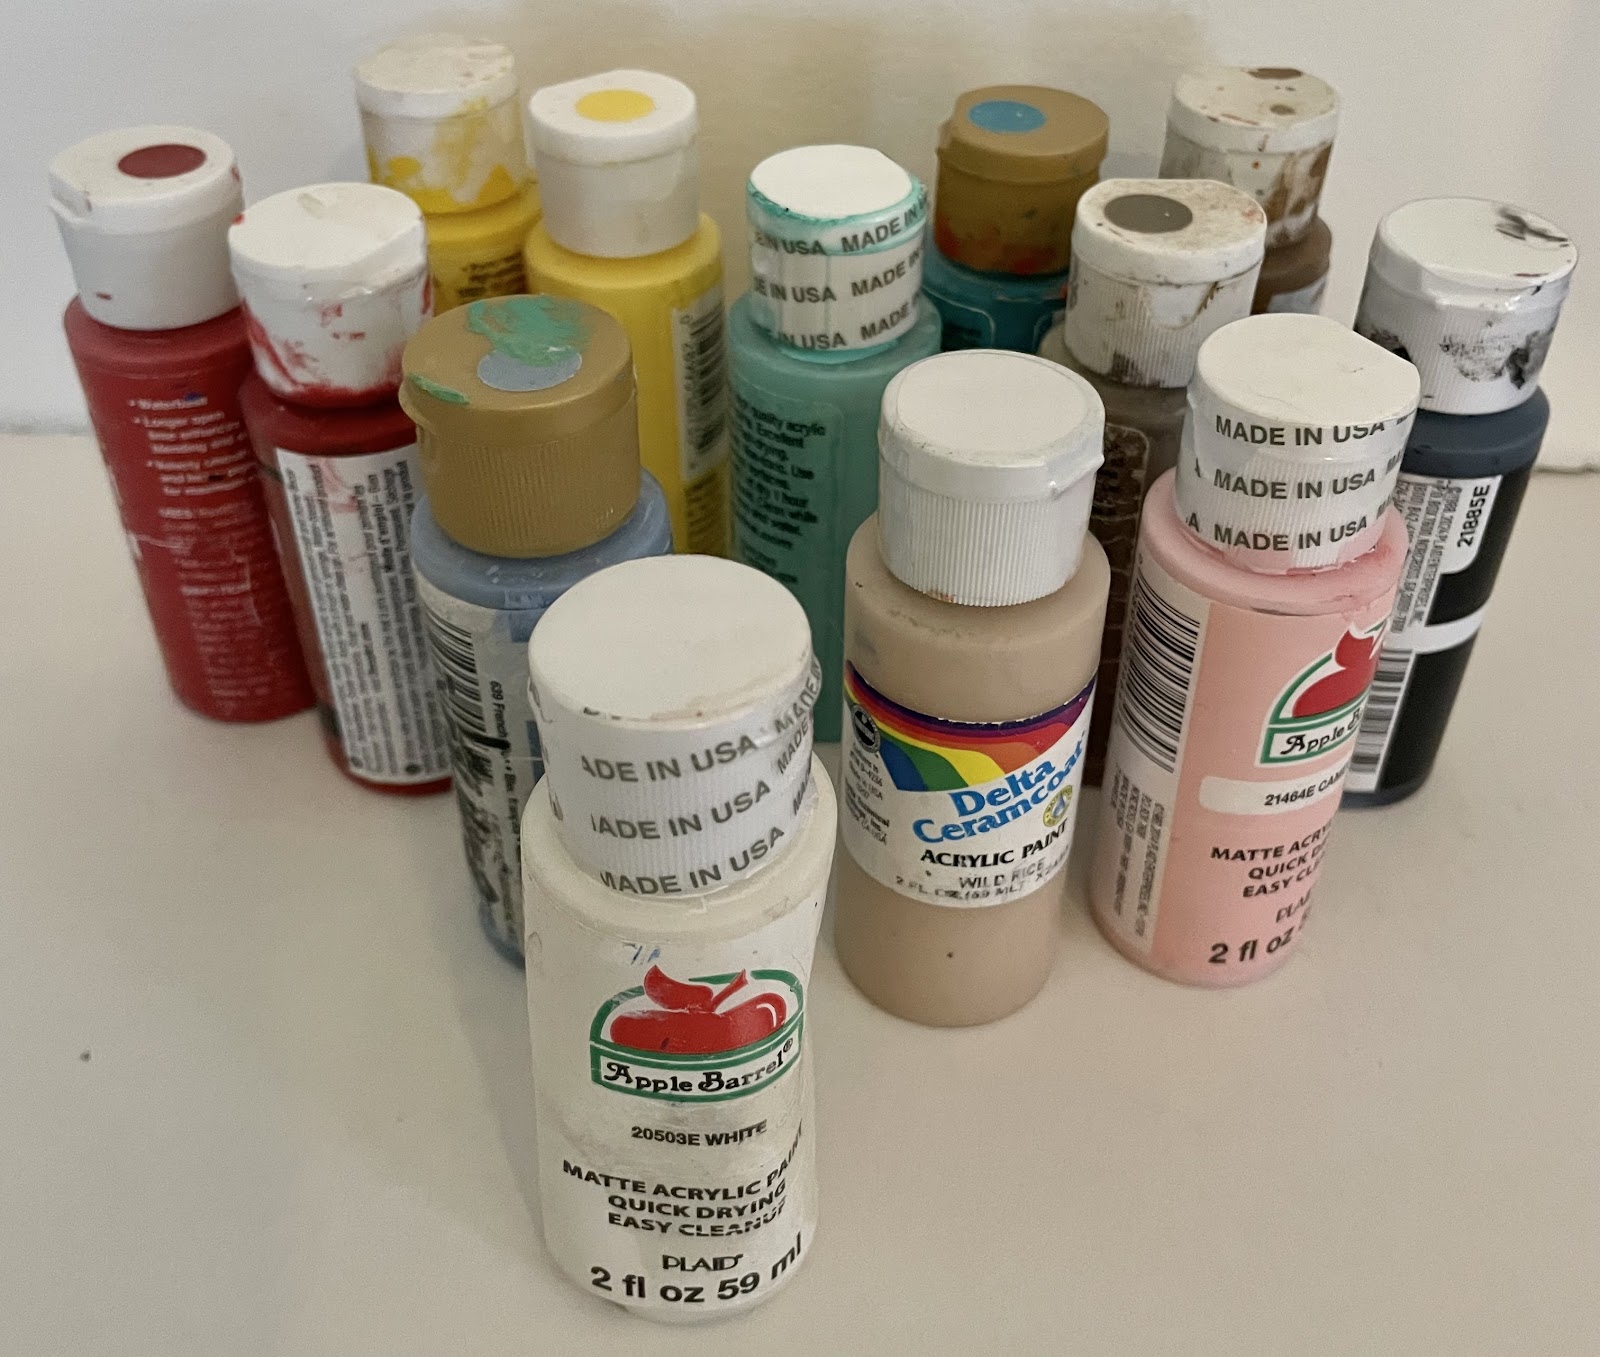
Hobby Shop Acrylic Paints such as Apple Barrel, Deco Art Crafter’s or Folk Art brands in a variety of matte colors
White Gesso
Parrot Feathers
Dyed Chicken Feathers
Fly Fishing Feathers
Dyed Red Horsehair
Cotton Butcher’s Thin String
A range of products used in restoration
Pile of cut up cottonwood branches and roots, with some tools
Cotton String, Bamboo Skewers, Watercolor Brushes and Parrot Feathers
Dremels with various bits
Tempera and Pigments
Blue/Gray Chalk Pastels range of colors
Flat Acrylic Paints
Restoration Techniques:
Research,
Just as important as putting something back together properly is making sure it's right. First you'll need to scour every book available to you as to what the new piece should look like. There is no 'winging it' when it comes to proper restoration.
3 Mixtures,
Wood Glue which has been thickened. Put some glue into an empty spice bottle, leave this uncovered for up to 24 hours depending how much glue you’ve squeezed into the jar. Once thickened you should have a glue that will adhere immediately.
Into a small cup add the powdered white clay, white elmers glue (at times I also add a bit of white gesso) and water. Stir this together to create a paste. This white paste is used to fill in areas of missing paint and gaps at ears and replaced parts.
Into another small cup add the powdered white clay, powdered putty, hide glue, wood glue and a water. This paste which will be a light being color is used for larger gaps. It will be stronger and harder than the white clay only mixture. This mixture can also be adapted for Pueblo pottery repairs.
Putting it together,
Use a sharp pin to create a pilot hole at the center of the part to be attached along with into the body of the kachina where the part is to be attached. Accuracy is important for this. With your dremel (or a standard drill) using a small drill bit, drill into both parts approximately 3/8” deep where you’ve made the pilot holes with your pin. using a bamboo skewer shave this down to a size that will fit tightly into the holes you’ve created. Cut this piece of bamboo at about 3/4” length. with a bit of thickened wood glue brushed onto it, insert the bamboo piece into the hole. Using a combination of the white clay paste and thickened wood glue sparingly brush these onto the surface of the part you are glueing into place. Onto the piece of bamboo dowel which has not been inserted yet brush a bit of thickened wood glue onto it. Now push the part into place carefully. As excess glue and paste squeeze out from this joint, use a soft dry brush to immediately clean up the excess adhesives. You may need to hold these parts together tightly for 5-20 minutes, you can not use a clamp or tape to do this. Remember to be cautious and to not crush the parts or break off any other parts.
Please Note: Bad glue (such as Gorilla Glue and Crazy Glue) leads to more complications down the road, such as staining and misalignment of the pieces. Please DO NOT USE these products for ‘do-it-yourself’ home repairs. To remove any dried glue spillage you’ll need to cautiously pick it off using a sharp ex-acto knife.
Replacement parts
Replacement of Ear/Wing
Carving a new piece,
If you are only replacing one new ear or horn you should have the original one to use as a template.
A new rattle, eyes or nose, etc. need to be based on what other kachina dolls look like. Do your research on this, don’t just wing it, the booklist I’ve provided in the post “On Collecting Kachina Dolls, Part 1” will be invaluable here, you can of course also search the internet for comparables.
Carving a new toe is best done by ‘roughing out’ a replacement piece of cottonwood with an exact knife. Then attach this to the foot using the bamboo dowel technique described above. After 8-12 hours it’s time to use your dremel with a sanding attachment to carve this roughed out part down to a matching foot shape (to the foot hopefully in tact next to it). Be extremely cautious to not lose control of your dremel and nick the existing foot, others you’ll need to touch that up later. When you get to a place where the dremel is too close to the other foot use sand paper and an emery board to fine tune the new foot replacement into the proper shape.
The type of absolute mess Gorilla Glue causes
Replacement of Wing/Ears and Toes
Painting techniques,
Matching paint on older kachina dolls is a bit of an art form in itself. There are several ways to go about this, the best of which is matching natural pigments to the doll color needed. I have at least 12 rust colors to use when restoring koyemsi/mudheads, they’re varying coloration can be befuddling for restoration, but when accomplished properly it is a moment of pride.
A selection of vintage dry tempura is the next best thing. If you think about what the Hopi carvers had access to, it was often a tempura brought into the trading posts and schools.
Using a piece of sandpaper you may grind down a matching piece of chalk pastel. At times I’ve gone into art supply stores to match the proper shade I needed to use, they often sell single pastels in an enormous range of colors and variations of shades. Matching a shade of dirty, faded white can be the most challenging. The color white is normally the white kaolin clay mixed with a binder (white elmers glue and a bit of gesso).
Mixing any of these dry formats with a bit of white elmers glue and water is the best formula to create a paint. Original ancient binders would have been yucca or aloe sap, pine sap, or hide glue, these are all tricky to handle and process.
Lastly, matching a ‘Hobby Shop’ acrylic paint can be more useful than you might imagine. These come in a wide variety of colors and are readily available, I tend to use the flat black on my restoration work. Only use ‘flat’ paint, do not use anything glossy.
Whether you choose to paint the new piece first, before attaching it, or after you’ve attached it to the doll is in most cases a matter of preference, just try to get the coloring to match the older paint.
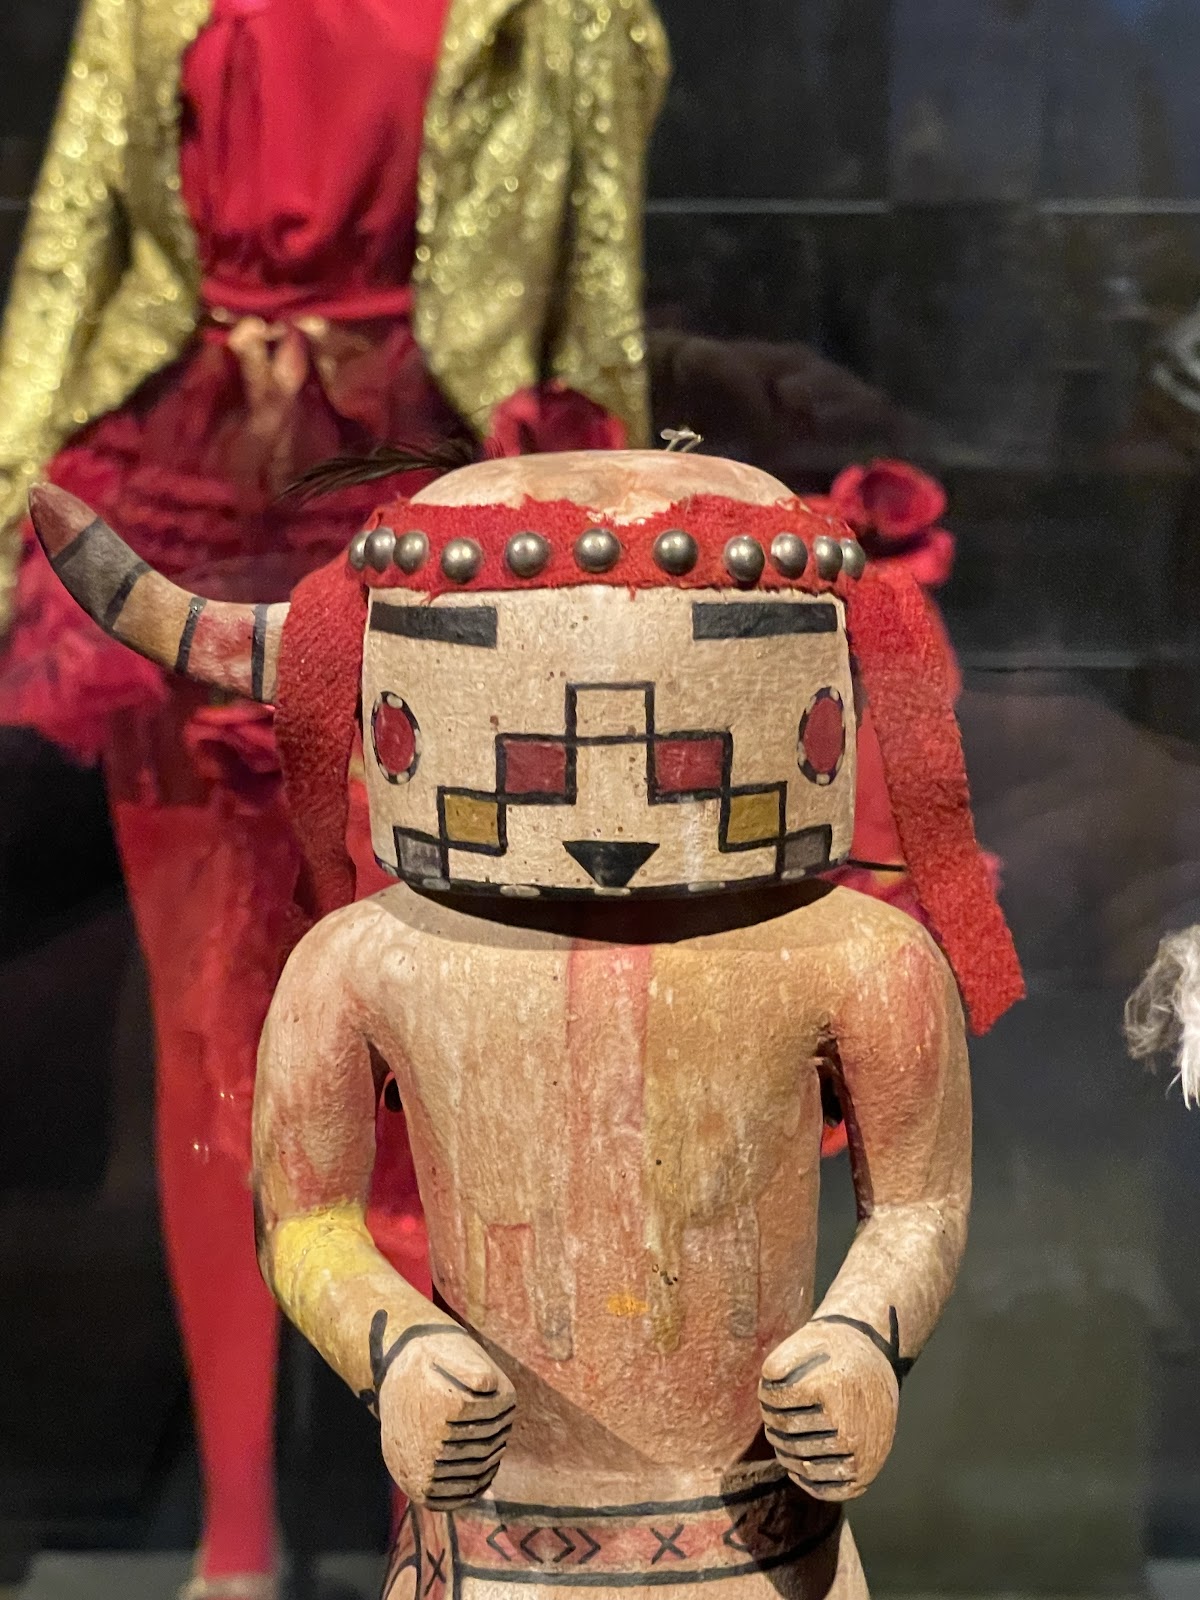
A Kachina Doll Missing a horn in the collection of the Musee du Quay Branley, Paris
A bit about feathers,
Raggedy feathers can be replaced, but if you start to see tell tale signs of feather damage place your doll into a sealed plastic bag in direct sunlight (such as on a windowsill) for a few days, turning it in all 4 directions every few days, this should kill most feather mites. DO NOT use pigeons feathers to replace missing feathers, they tend to be loaded with feather mites. The best source for feathers is a Fly Fishing shop or hobby shop, where you can purchase various types of small feathers. Replacement feathers are the easiest of DIY projects. US laws regarding Kachina Dolls with bird of prey or songbird feathers attached forbids the sale of these dolls. They are legal to own privately but not to resell (the FBI is not going to knock down your door to inspect the feathers on your kachina dolls!). Ornithologists and anthropologists are befuddled by figuring out what’s what when it comes to feathers, however most bird of prey feathers are easily recognizable and should be replaced with parrot, turkey or pheasant feathers (contemporary carvers use these types of feathers). In the resale marketplace, questionable feathers should be removed and replaced if they aesthetically change the look of the kachina doll. At one time I believed that all removed feathers should be returned to the Pueblo, the thinking now is that they prefer that these are not sent back to them. My solution has been to place them in a piece of cloth that I can then insert into a hollow log in the forest.

Cleaning and maintenance,
Use an artist watercolor paintbrush (or an oil paintbrush with stiffer bristles for tougher cleaning) to brush away any dust that has accumulated. This is the only way to actually clean your doll.
Do Not use any form of liquid or even a damp cloth as this will melt the kaolin white clay ‘duma’ base.
Restoration of Contemporary Kachina Carvings,
Some Native American Museum gift shops may have contacts among Hopi carvers to have a contemporary carving repaired. Consider reaching out to a museum specializing in Native American items, one that sells contemporary crafts in their gift shop.
As you can read here, supplies and requirements for proper restoration can be overwhelming. IF you choose to ‘do-it-yourself’ I wish you the best of luck with it. Remember to show the doll a great deal of respect as you begin, moving slowly and cautiously at each step.
Although I chose to not monetize my blog posts with advertisements I do hope that you will take a look at the Kachina Dolls we offer for sale on our website at twograces.com or by following our Instagram feed @TwoGracesTaos & @KachinaRestoration
Visit our ‘brick & mortar’ shop in the Taos Historic District at 105 Barela Lane, there is free parking in the Taos Inn lot directly behind us.