Saturday, December 26, 2009

What I Got for Christmas: A Slight Concussion, and a Good Long Nap!

It was my own darn fault and my own bright idea to go off for a hike on Christmas Day with Holly. I chose the Taos Ice Cave hike, which is always longer than you'd expect it to be, and a whole lot colder, too. We don't have snowshoes or cross country skis, just warm socks and boots. There had been one person cross country skiing on this trail with a dog, otherwise all the tracks were of a large variety of the local wildlife, Elk, Mule Deer, Rabbits, Jackrabbits, Chipmunks, Birds, and other unidentifiable critters.
In reality the cave is but a cliff shelter overhang, with water tumbling off the top of which freezes at this time of year into massive stalactite icicles.
Trying to get a better picture, I slipped on the ice and gonked my head on the largest column of ice. Results, a mild concussion, causing me to sleep most of Christmas Day.
As these gi-normous icicles melt they create a water pipeline into the babbling brook below.

Holly inside the cave and a view looking out.

Stalactites/Icicles

Holly leaving the cave and stream to head up to the trail.
Now, the question is, where is it? answer: Nope not going to tell...

Wednesday, December 23, 2009

Olde Rancho Church, the Most Photographed in the USA

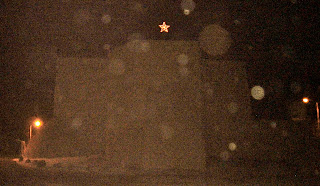
Yesterday I went up onto the roof of Two Graces and took this picture of the San Francisco de Asis Church with the star on top and a slight dusting of powdered sugar snow.
Just after 5PM last night it began to snow, the Farolitos & Luminarias were set up around the Church and the Star was lit up and flashing. On my digital camera screen it looked as though it were a shooting star. Somehow there are indeed stars in the sky, even with the slight cloud cover and the snowstorm moving in.
The white flecks in these photos are of the falling snow. With my very simple, lo-tech digital camera the only thing I could actually see on the viewfinder were any of the electric lights, so basically I aimed and hoped for the best.

The paper bags and the piles of firewood, (Farolitoes/Luminarias) set up around the Church are lit to attract the Faithful & most importantly Jesus Christ, (or Santa Claus, as well).

I've saved the best for last, here's my favorite shot of the Church, isn't it a doozy!
If I knew how to, I'd take out those two lights on each side, at least the electric & phone wires are gone now, and in this shot you can't see the gas meter on the lower right side, (you can see it in the first image).

Saturday, December 19, 2009

Rest in Peace James Heaton Texas BBQ Pit Master

Taos has recently lost a truly great human being, James Heaton. I was fortunate to get to know James when his Texas Barbecue Restaurant was here in the St. Francis Plaza. His was one of my Dad's favorite local restaurants, and for a short while James named a sandwich after him "The Big Al". He was about my age, which of course gives me pause to think, but that's not the only reason I've decided to write something here, and not to get all poignant and weepy about this BUT. For weeks on end now I've driven by the BBQ restaurant meaning to stop by and say hello to James & Debbie his partner and baker extraordinaire. When they moved to their latest location they were so busy they'd asked me to come to work for them, they knew I could use the extra income, never having waited tables before I'd turned them down.

There's always something to do and you think you'll catch them another time, but now there is no "another time", and that's a problem we all face.

PLEASE, remember to call, visit, email, facebook, tweeter, send smoke signals if you have to, or just communicate with your friends and family, somehow TRY to do it on a regular basis.

For years my Dad would call me up every now and then and say to me, "How did you manage to break both your hands, they must be broken because you haven't called your Mother in a few weeks now". I'd have to explain how busy I'd been, excuses, excuses, BUT I did learn to call my Mom every week, and if I miss a week, it's because either I really am busy or she didn't pick up the phone when I did call. Sometimes I call just to ask her about a recipe. When I can make my Mom laugh whenever I speak to her is the best feeling in the world.

Here in Taos I am truly blessed that people do stop by for a visit. The best time to visit is in the Winter, when the shop is usually quiet and I can make you a hot cup of coffee and maybe even serve you a few homemade cookies.

One More Post About Chicken!

Somehow I discovered a box of these Vintage Wishbone Reindeer ca.1964, these are so unusual I seriously doubt they will be seen anywhere else, (that is unless my Mom herself starts making them). As you can see from the instructions below they are made with 3 wishbones. These are elaborately decked out with sequins, bells, vintage costume jewelry, & felt tails! I have provided a close up of 2 of the little darlings, they are all sold out. As always click on a picture for a close up view.

Saturday, December 12, 2009

Chickeny Roast Chicken Plus

Sometimes a Whole Roast Chicken is the best thing to make for dinner. I'm telling you right now, "Walk Away from the Store Rotisserie Chicken swingin' away in that darn cooker in front of you when you get to the market!" Why, you ask, It's so good you say, have you ever worked in a market, where the first thing to get cooked up is the stuff that's just going out of date if not already out of date, yup, they aren't going to toss that stuff, they cook it up and sell it to you, YUCK. So, now that I've got you disgusted, pick out a whole raw chicken and get an organic free range which you may pay a dollar or 2 more per pound, but taste-wise is well worth the couple extra bucks. Once I myself, cheapskate that I am, discovered the quality difference by driving all the way out of my way to the local Whole Market and purchasing the organical free range bird, I was hooked, and where chicken is concerned, I now go out of my way for it. Get out your cast iron skillet or a big oven proof cooks pan, and ad a small amount of olive oil to the bottom of that pan. Turn the stove to burner on and the oven up to a high setting. Start by cutting down each side of the back bone and removing it, (I said back bone and if you don't know the difference stop right there and go eat mcnuggets someplace), do this under cold water in your sink, try not to get juices all over the place, we're talking chicken here and most chicken is going to salmonella up your kitchen counters, cutting boards and everything else it comes in contact with. Use plenty of paper towels to pat it dry, and put it breast side down into the pan you'll be cooking it in. Now wash your hands, the sink and knife with some dawn detergent/dish soap, (have you seen the endorsements Dawn gets, use it, because this is what they use to clean up sea animals after oil spills, and if it can clean up that sort of mess, imagine what it can do to all that salmonella). Now season the chicken with salt, rosemary, pepper, and maybe some other herbs you like, both sides please. Crush some garlic cloves in their skins and add them to the pan also. Drizzle the chicken with olive oil, balsamic and Worcesteshire sauce, not too much. Add some small potatoes, or medium potatoes quartered. Put this onto a hot stove top and cook for 5 minutes, flip the bird and shove all those taters and garlic under it, now the breast side is up, and put this directly into your preheated oven set at 450, yes We are Iron Cheffing it by turning up the heat, we've got hungry people to feed and they don't want to wait over an hour. The bird will be cooked in about 45 minutes, or until beautifully browned on top, see picture below, that's one perfect roast chicken, and those potatoes are cooked. While you wait, you can hang out with your sweetie on the couch, maybe smooch a bit and talk about the day you've each had, open some wine and pretty soon it's all done, dinner's ready.
There's some fancy French term for all this cooking of a chicken split open, what I know is the bird is more flavorful this way and cooks faster. The Il Piatto variation of this is to add more Balsamic and Olive Oil to the pan when you begin and a lot of Garlic, and cook for longer and at a lower temperature. The results are similar to the above, but a little too much oil, unless you prefer your chicken served with rice or bread for sopping up all that good stuff. They also cook more root veggies with the chicken, which is also great, I've cooked up some Brussel Sprouts with this particular dinner, but they go into the pan about 20 minutes before doneness of the bird sets in otherwise they'll overcook.
Now here's the really tough part, DO NOT EAT THE ENTIRE CHICKEN IN ONE SERVING! Serve about half the breast with the wing, drizzle the pan juices over your plate of food hopefully you've also cooked something green or served a salad. Save the rest for the next night because now the possibilities are endless for leftover chicken. If you eat the whole bird you will wake up with a belly ache and you'll miss out on:
Chicken Sandwich with Roasted Red Peppers, Mustard and Arugala/Rocket on nice crunchy bread. If you saved some of that roasted garlic use it on this sandwich!
Chicken Soup with Dill & Oregano, Carrots, Celery, Potatoes, and chicken broth you made with that leftover back bone. I use Potatoes not too many, because when they are done the soup is done, served over Rice or Pasta or Egg Noodles.
Chicken with Pasta, Broccoli Rape, Garlic, Hot Red Pepper Flakes, and Sweet frozen Peas, with Butter and grated Parmesian Cheese.
Chicken stir fry with Basmati Rice and veggies.
Now with that one chicken you've got at least 2 meals probably 3, and all told those groceries added up to $40.
As for your sweet treat, open up that container of Ben & Jerry's and share, you're welcome.

Friday, December 11, 2009

Bad Kitty Painting step by step

Here's my step by step on painting this week, this is a 2 part painting that I call Bad Kitty, Good Kitty. The idea was to use a salmon pink background color with Hello Kitty images floating on top, but with some push and pull illusion, which is difficult to see in these small pictures here. The first step was the surface, I'm painting onto a hard surface which has been gessoed, it sits onto a 2" frame, no canvas although I do sometimes stretch a canvas over this surface and use heated rabbit skin glue to shrink the linen canvas onto the board, then gesso on top of that before beginning to paint. Once the painting surface is prepped I begin to paint the background all over the surface, layer upon layer using pallette knives and brushes.

The color of pink is a tricky one to use and not the most sellable color that I work with, but I have a fondness for it. When I was first starting out after graduating SMFA, I attempted to find a gallery in NYC that would show my odd colorful "Cave Paintings". Each week I would send out a dozen packets of slides, resume, cover letter and stamped return address envelope. Half the time there would be no response and my slides were lost and not returned sometimes a letter would arrive thanking me and telling me they would be happy to keep my slides on file. BUT, the HOLY GRAIL day happened when one of the galleries sent a very nice letter saying that if I were in NYC sometime to stop by the gallery, well a small opening but an opening nonetheless. As I was accustomed to driving to NYC for a few days at a time staying with friends or family, I immediately called to say I'd be there at the Gallery the next day. Well, the director wasn't in and she was very busy. Knowing that most galleries in the East Village those days were pretty much a one person operation I told the person on the phone to let the director know I'd be there at 11AM to meet her when she arrived. Simply put, I made an appointment for myself with the gallery director herself. At one point the East Village Gallery Association printed a magazine that included photo headshots of all the gallery owners, after this they were all fair game and easy to spot. There I was that very next day at 10AM parked right out front of the gallery, with my car full of paintings, it was late October. As the Gallery owner unlocked the store, I approached her with a few of my paintings under my arm and introduced myself, (yes, I know, shades of stalking here, but very harmless), no she didn't have time for me she had a very important meeting lined up, (with her cup of coffee). After a couple of minutes she acquiesced and asked me to unwrap the paintings and line them up on the floor against a wall. As I did this and she began to look, and then began to laugh, yes, actually laugh. Instead of this being devastating she asked me to show her some more, which were merrily waiting in the trunk of my car conveniently right out front. Then she explained her laughter that she'd never seen a pink cave painting before and thought this was brilliant. After a bit of discussion she decided to add me to a group exhibit that she was doing for November a few short weeks away. Yes, a pink painting got me my first exhibit in NYC, and to EH, a sincere thank you for the laughter.

I use acrylics of all sorts, sometimes even gouache, different companies make their paints very different, some use more pigment, and some less so, some are cheap and some very expensive.
Eventually the surface begins to emerge to a place that I want it to be, I've spray painted a stencil of some construction netting onto the top and then too painted over this to soften it. Once it's to my liking I make the drawings of the figures to paint on top of the near complete surface. The drawings are done on a sheet of translucent vellum, which allows me to see where they will sit on the surface without covering some of my favorite passages in the paint. I've also arranged the figures in a pattern similar to a rock art wall arrangement, which may have repeating animals or humanoid figures. With an exacto knife I cut the figures out and tape the entire sheet onto the surface adjusting as needed, and trace the figures in pencil onto the surface. Another tool that I use is an old fashioned needle wheel that can be traced over the drawings on vellum and leaves tiny hole impressions onto the surface of the painting, Old Masters would use this technique and tamp a powder into the holes leaving a clear defined "cartoon" drawing to then paint. When I use this technique if you looked closely at the surface you would see tiny lines of holes in the surface.

The white I'm using is Flasche a very chalky dense acrylic that is like using cake icing. This in combination with Pelikan Gouache Concentrated which is more like a soft lipstick to paint with, and a very old tube of liquitek acrylic that is the consistency of cream gone bad, very bad, but very textural. After painting in the reds and pinks of the bodies I've got a big decision to make, which is do I actually paint in the eyes, nose, and yes mouths. I can always take them out if I decide they don't quite work, but to me they do work, and what I was after in the first place this group of floating figures push and pull against the surface and create that dimensional look I was after. The figures are given an outline using a soft black pencil, keeping that cartoon look going. References to paint being like foods and other things remind me of being at dinner parties with other SMFA faculty, people would just randomly start painting with the pot of mustard onto a napkin. DeKooning would mix his paints to a mayonnaise consistency to get it to flow off his brush just so. And the "secret" formula that Rothko used still has people wondering exactly what it was. It's easier to actually paint when the medium doesn't fight you as you try to get it just right onto the surface, so rather than gel mediums and binders mixed into it, I look for paints that work for me rather than against me. Once I painted in the facial features, I did add a bit more color around the floating cats to create a bit more movement for the viewers eye. None of these are behind or in front of one another and they are all the same size but they do give an illusion of depth.

Painting, actually painting can be so rewarding that I really don't understand the hotshot artists who have other people do the actual painting.

This last image here is the completed painting titled "Bad Kitty", it is 24" x 24" It's companion piece is titled "Good Kitty", being the same size and coloring, with different placement of the figures. These paintings are priced at $1,200. each. As you scroll down on this blog you will find my Kitty & Friends works on paper which are $125. each.

Time for one more story. When we first moved here to Taos, the idea was to continue making art and to not start over again by painting southwest landscapes and "indians" but to stick to what we've always done in the styles we've developed. There came an opportunity to be in a benefit exhibition at Gallery A for the Taos Art Institute. I decided to make a "Hello Kitty" in the style of the great NM retablo artists of the 1800's, I made a beautiful Guadalupe Kitty painting, with punched tinwork on top as a crown, along with 10 small standing Guadalupe Kitties with tin rays attached to the backs and provided a shelf I'd built to display them on. When I dropped this grouping off for the exhibit the gallery director said something like: who the H*%# did this! I eeked my way out of there and quick, but when the show opened I'd sold a bunch of the free standing Guad Kitties, hooray. In the gallery director's defense, she didn't know me and didn't know I was standing there, years later she and her husband have purchased a nice assortment of my paintings and works on paper and for all their support I am very thankful. The retablo went unsold, until very recently when a bunch of people came into the shop talking away, and as you can hear everything people are saying in my store, I spoke up took them to my flatfile and brought out the Kitty Retablo. When I told them the price it was done, the one lady who had been talking about this painting to the others was beaming with happiness that she hadn't missed out on purchasing this painting after all.
Gallery A is gone from the Taos Art Gallery scene, and Jus de Pomme is gone from the East Village, the NYC art scene had moved over to SoHo, and now sits very nicely in Chelsea, meanwhile I have my own Gallery Two Graces here in Taos, NM.
Very nice indeed, so these 2 experiences come together with 2 new HK paintings.

Tuesday, December 8, 2009

Food: Risotto & Gingerbread Cookies, The Savory and the Sweet

On cold wintery days like this there's nothing better than comforting food like a dish of Risotto.
Here's my recipe for two:
Dice 1/2 a small Onion, one stalk of Celery and 1/3 Green Pepper, add these to a large sauce pan with some Olive Oil and stir until softened, season with a generous pinch of Salt and some Black Pepper, then add a bit more Olive Oil and
3/4 cup Arborio Rice, it's available even in Taos, along with 1/2 ounce or more of dried Porcini mushrooms. Bollitos grow in the mountains around Taos if you've still got any left dried or frozen from the summer season otherwise use the dried Porcini. The idea is to coat all of the rice with oil, so stir this up a bit without burning with your stove top around medium high. Now a pinch of Rosemary and a little Sage, (you may also add some chile powder or other herbs you may prefer). Add about 1/3 cup of Chicken stock, or vegetable and stir until the liquid reduces, do not add too much liquid at any given time, slowly adding liquid keeps the Risotto creamy, which trust me on this, that's what you want. You can alternate using some White Wine of your choice and the broth, but the wine tends to be a bit acidic and will need to be counterbalanced with more butter at the end. Stirring should be fairly constant, along with adding more liquid, a can of broth is about 2 cups you'll need as much as 5 cups all told, depending on your heat. Taste the rice after 1/2 an hour hour, it should be getting bulkier, but still be a bit too al dente, it should be ready in 15-20 minutes more, around 45 minutes. Keep tasting, try not to overcook which will result in mushy rice instead of creamy, what's the difference you ask, hmmm...an hour is too long, 45-50 minutes tends to be about right. Add some Butter at the end not too much I'm not trying to send you to the hospital here about 1/4 of a stick, if you did use White Wine, you'll need half a stick, I know what I said, that's why I usually don't use the wine. You may also grate some Parmesan Cheese into the rice just before serving with some grated on top when you've put it into the bowl. Also a bit of Black Pepper on top is nice. if you need more salt let your dinner companion add their own. Sautee some fresh Brown or Shitake Mushrooms in a little Olive Oil, with Pepper, Salt, Rosemary and a drizzle of Balsamic Vinegar, which will sweeten and carmelize.
Yum! This can also be done with other main ingredients, Shrimp added at the last couple of minutes, instead of the Mushrooms. Or, a cup of cooked steamed or oven roasted Pumpkin or Pumpkin type Squash, added during stirring, Or, steamed or roasted Beets and their Greens. This can be a summer dish with Arugala/Rocket added into the serving bowl with the Risotto on top, maybe some left over Roast Chicken on top, too. Risotto, Stir It Up!
Gingerbread Cookies with simple icing
Use a large bowl
Melt 3/4 Cup Butter add 1 Cup Mollasses
1/4 Cup Brown Sugar, 1/8 Cup White Sugar
2 Eggs Beaten, 1 1/2 Tsp Ginger, 1/2 Tsp Nutmeg, 3/4 Tsp Cinammon
all of this into the bowl once the butter has cooled down,
do not mix the hot butter into the eggs.
4 Tsp Baking Powder, 4 1/2 Cups Flour
Mix this all together add the Flour a bit at a time, this will come together as a big golden mass of cookie dough, DO NOT EAT ALL THE COOKIE DOUGH! (yes, you may sample it)
Roll the dough out to less than 1/4 inch thickness and cut out with your favorite cookie cutters.
You'll be making a lot of cookies about 5 cookie sheets full of cookies, WOW that's a lot of cookies even for me. Bake them at about 350 depending on your oven, mine requires about 325
Bake in the top part of the oven, and check them after 7-8 minutes, it may take 10 minutes baking total, I prefer them soft, if your preference is for a hard cookie roll out the dough thinner, either way is delicious as you can tell from nibbling that dough earlier.
After the cookies have cooled, never frost anything while it's still warm or you'll find that the frosting melts into the cookie or cake. Frosting is simple: Powdered Sugar, with a bit of Food Color, and a bit of water, if you add Meringue Powder to this the frosting will harden quite nicely, you do not need to beat this frosting into submission just mix it until it looks like it has all come together not too watery. If you've made too much frosting do not start eating it or you'll have a tummy ache all night, but you may now EAT THE COOKIES, remember to share.

This recipe was given to me by a friend back in Boston, after a Christmas party at their house where I could not stop eating these delicious the BEST I EVER ATE GINGERBREAD COOKIES,
you're welcome, eat and enjoy, R

Paperwhites or Narcissus fancy indoor garden for Winter

Paperwhites are fairly easy to grow, they require some water, sunlight and a shallow bowl filled with rocks or something like rocks, potsherds, marbles or seashells for instance would do just as well. To a shallow bowl, something about the size of your cat dish, but don't use the cat's dish if you've got cats you really don't want them to drink from it or eat the plants as they grow, add your rocks or substitution. You could use a water proof can such as a peanut tin, as long as it's tin and not cardboard, wrap it with some nice decorative paper, tie it on with a ribbon or use a gluestick to keep the paper in place. Please do not use a native american southwestern pot to do this in, they are not made to be waterproof, and I've seen far too many used to hold water and how damaged they can get from this. To me the more difficult part of growing paperwhites is to actually find the bulbs for sale, I bought these at the big box store, sorry but they had them and the local garden centers don't carry many if at all. They are always 'winter hardened' when they are sold, which means they are ready to grow when you are, so please don't put them into the freezer. Now that you've got your stones in the bowl arrange the bulbs on top of the stones, root side down, add a few more stones to keep the bulbs in place, add enough water to touch the bottom of the bulb. Do not add too much stuff on top such as moss or whatever you're thinking might be lovely, you need to see the water level. Grow them in groups of at least 3, 5 or more. Keep the bulbs watered enough for the roots to grow into the water. You should not ever add so much water that the bulbs become submerged, or they will rot, what's that disgusting smell, yup the bulbs are rotting, dump all of that fetted water out and let them dry out a for a day before you add the proper amount of water. The wonderful smell that paperwhites are all about will come about once the flowers are blooming as in these pictures, and right now mine are wafting an amazing perfume that I can smell from a room away.
These are two groups of 5 in each pot, (they came in a bag of 10) Paperwhites I've been growing in the gallery window at Two Graces, where they get almost enough light. If they got enough light they would not grow so tall, which can sometimes mean you'll have to add stakes and tie them with ribbon. At some point mine will need to be staked, which usually happens anyway, and that's alright really, just do it as they start to get too top heavy and fall over. The root systems should be established enough under those rocks that they won't actually fall out of the bowl. These are a winter treat, which you can start the day you purchase them or save them for later from October through to March.
Top picture: handmade Birch Twig box with tin liner
Bottom Picture: Taos Raku Bowl w/star pattern

Monday, December 7, 2009

How in the world do you know Leslie Hall!

Yes, it's true, my nephew couldn't believe it when he saw the Leslie Hall video by my DVD player and her picture on the fridge. That's she & I (yes I know Bono stole this look from me) for those of you who don't know who she is just google Leslie Hall or check out Amoeba Records website for a sample of her music. Leslie was one of my students back at SMFA, not one who attended classes all that regularly. Her brother helped Holly & I drive the truck full of our possessions out here to Taos about 8 years ago. Well that first Spring we were here less than a month, when Leslie & Laura showed up in Taos. We had been out for the day and when we returned home the TV was on, I started to say how in the world did Rosie the cat figure out how to turn the Television on when Leslie & Laura popped up from the couch. Now how they found where we lived and how they got into the house was a bit dicey at best, but here they were and it was great to see familiar faces here in Taos. Someplace in my photo archives I've got a picture of her Mom and sister with HH, Holly & I having dinner together after HH graduation from SMFA, and more pictures from her Sponge Bob themed Birthday party outside taking wacks at a Pinata, me blindfolded and swinging away, (that's my painting in the foreground).
For those of you curious enough to check it out I believe these url's can be copied and pasted into your browser.
http://www.youtube.com/watch?v=JveLaQRmnK8
http://www.youtube.com/watch?v=nWVzlfUfjGk
one is called Leslie Hall Presents SMFA
and the other is Leslie Hall Craft Talk
If the url's don't work just google these titles.
To me these are the 2 best videos and rather infectious, they've cheered me up a lot, thanks Leslie, maybe we can get you out here to Taos sometime soon and perform at Two Graces, wouldn't that be FUN. Leslie was performing recently at Art Basel Miami, there is some video online of this performance, AMAZING. We're proud of you and perhaps a bit frightened!